👉 Lego LED matrix clock
October 23, 2019
Recently I have become a big fan of legos. While I was looking online for a cool lego clock and couldn't find any I decided to build my own. So I made this using some Legos, an Arduino, some jumper cables and a LED matrix. To be honest I build the actual clock mostly based on these two awesome tutorials:
- This Instructable which was very useful to get the materials list and a pretty good schematics diagram
- Blog post used to get into more details of the clock building. You can also find in this post the code I used on my own clock. I decided to used this code since it has multiple features I wanted.
Here is how I built it...🛠
1. Materials
Here you will find all the materials you need for this project:
- Arduino Nano
- RTC Module DS3231
- Four pieces LED Matrix
- Small breadboard
- Jumper cables
- Soldering Iron
- Tons of Legos...

2. Schematics
Here is the schematics I followed along to make the clock work:
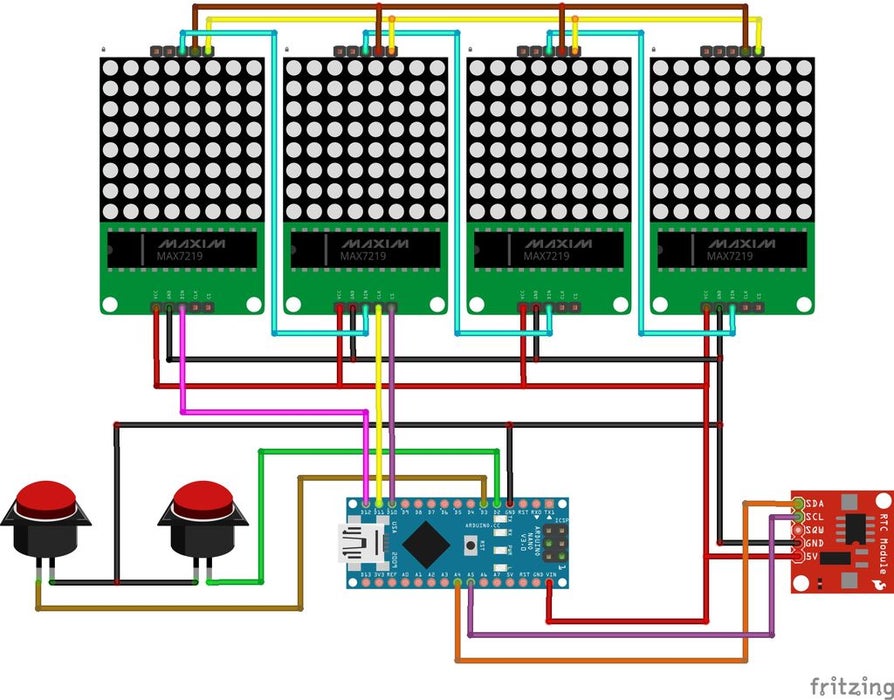
I tested the schematics and the code before building the final clock:

3. Code
You can download here the code I used on my clock. The full credit is on: Nick Hall who wrote the code to have this cool clock interface.
You will have to download the code and the upload it to your Arduino. Remember to install the needed libraries our else you won't be able to make it work. If you run in to some issues with the actual time setting on your RTC module I used this simple tutorial in order to setup the time correctly.
I hope you find this useful and inspiring 🛠 I'm currently working on a 3D model of the actual clock case I build with Legos. Expect more on this soon.